Installing a garbage disposal is not hard!
How To: Install a Sink Disposal

Photo: KStansley
Depending on what part of the world you’re from you may have heard sink disposals referred to as “garbage disposals,” “food waste disposers,” or, if you’re really proper, a “sink waste disposal unit.” Whatever you call it, switching one out or installing a new one is a fairly simple task.
GETTING STARTED
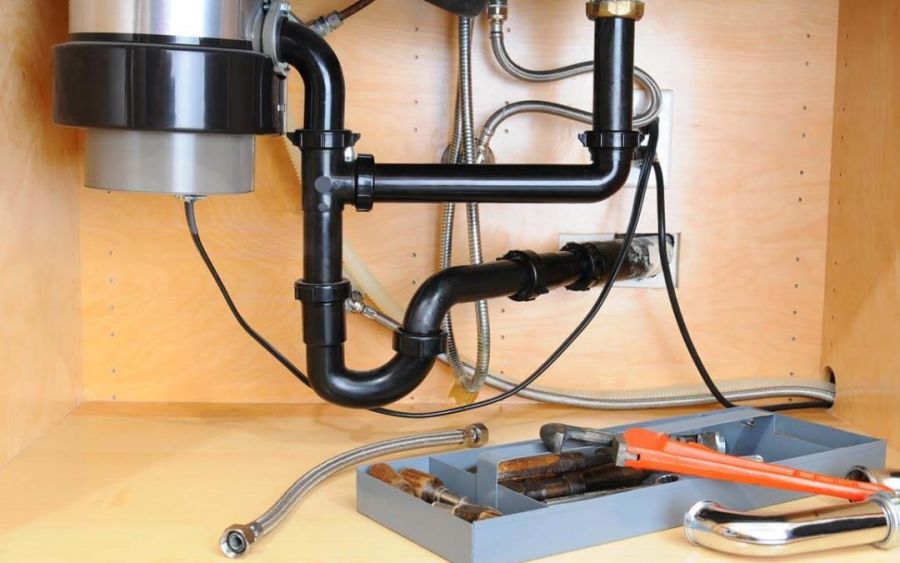
There are essentially four connection points for a sink disposal:
– Where the disposal connects to the sink, under the drain
– Where the drain line connects to the disposal to remove water/waste
– Where the disposal connects to power
– Optionally, where the dishwasher connects to the disposal
The most important things to know are how the disposal gets power (either through a plug or direct connection) and whether or not you need a dishwasher line connected to the disposal.
MATERIALS AND TOOLS Available on Amazon
– Garbage disposal unit
– Outlet connection kit (if the disposal needs to be plugged into an outlet)
– Screwdrivers
– Hammer
– Plumber’s putty
– Putty knife
– One “self-service wrenchette” (included with disposal, and no, I’m not making this up)
I think this “wrenchette” answers the age old question of whether or not tool manufacturers have a sense of humor!
INSTALLATION
Step 1: Wiring for power
To prep your unit for installation, you may have to attach a cord with a plug to reach the outlet, or extension wires to reach a hardwired box. In this case, I attached a cord with a plug kit that I bought separately from the disposal unit. It’s as simple as feeding the wires from the cord through the disposal and attaching them to the matching colors on the unit with wire nuts.
If you have to hardwire the unit, wait until it’s installed under the sink. Note: It’s probably a good idea to shut off power at the breaker now, so as to avoid forgetting to shut it off later. If there’s anything worse than being shocked by a live wire, it’s being shocked by a live wire while under a sink.
If there’s an existing disposal, use the handy self-service wrenchette to disengage the old unit from the bottom of the sink. It will fit in the holes on bottom piece of the bracket. Twist the bottom piece clockwise while supporting the bottom to get it free.

Photo: Kit Stansley
Step 2: Dishwasher Punch Out Option
This is not something you do with a misbehaving machine, but it’s a very crucial step if you have a dishwasher and you want it to work. If you don’t have a dishwasher you can skip directly to Step 3. For everyone else, there’s a little plug inside the dishwasher connection which needs to be punched out with a screwdriver and hammer. Again, only do this if you are attaching a line from a dishwasher at the time of installation.

Photo: Kit Stansley
Step 3: Installing the Drain
If there was an existing disposal attached to the sink already, it’s likely that the new unit will fit the existing bracket. If not—or if there is no disposal currently in place—start by removing the old drain. Most drains are attached to the sink by a large nut underneath the sink that can be turned counter-clockwise to loosen.
Installing the new drain is a simple matter: First, create a snake out of plumber’s putty and circle the drain from the top. Then install the top half of the drain from the top, and screw the nut and mounting bracket on from underneath. Make sure to remove any excess plumber’s putty using a putty knife.
Step 4: Installing New Unit
Position the unit so the existing pipes/hoses line up, and then use your self-service wrenchette to move the bottom piece of the mounting bracket counter-clockwise until tight.
Then attach the waste pipe (and dishwasher hose, if applicable). If your unit is outlet-ready—pay attention to this part—make sure your disposal switch is in the “off” position before you plug the new unit in. While it’s unlikely that having a disposal start up while your head is pressed against it will lead to decapitation, it may scare a couple of years off your life. Not that I would know from experience.
If you need to hardwire the unit, make sure the power is off to the box (I recommend shutting it off at the breaker) and then attach the wires to the corresponding color using wire nuts.
Once the unit is plugged or wired in, turn the breaker back on, run the water and have fun chopping food waste to bits!
Source: https://www.bobvila.com/articles/how-to-install-a-sink-disposal/
Ace offers carpet cleaning, upholstery cleaning, pet odor removal, tile / grout cleaning and more to Anderson SC and all surrounding areas.
Carpeting is an important investment in your home. The early death of carpets isn’t the result of foot traffic; rather it is frequently associated with stuck soil in the carpet material. Rotating brush machines and daily vacuuming with strong suction removes only 50% of that soil.
To get the required carpet cleaning in Anderson SC you will need a professional carpet cleaning at least once every 6 months.