
Installing a garbage disposal is not hard!

How To: Install a Sink Disposal

Sink Disposal

Photo: KStansley

Depending on what part of the world you’re from you may have heard sink disposals referred to as “garbage disposals,” “food waste disposers,” or, if you’re really proper, a “sink waste disposal unit.” Whatever you call it, switching one out or installing a new one is a fairly simple task.


GETTING STARTED
There are essentially four connection points for a sink disposal:
– Where the disposal connects to the sink, under the drain
– Where the drain line connects to the disposal to remove water/waste
– Where the disposal connects to power
– Optionally, where the dishwasher connects to the disposal

The most important things to know are how the disposal gets power (either through a plug or direct connection) and whether or not you need a dishwasher line connected to the disposal.

MATERIALS AND TOOLS Available on Amazon
– Garbage disposal unit
– Outlet connection kit (if the disposal needs to be plugged into an outlet)
– Screwdrivers
– Hammer
– Plumber’s putty
– Putty knife
– One “self-service wrenchette” (included with disposal, and no, I’m not making this up)

I think this “wrenchette” answers the age old question of whether or not tool manufacturers have a sense of humor!

INSTALLATION

Step 1: Wiring for power 
To prep your unit for installation, you may have to attach a cord with a plug to reach the outlet, or extension wires to reach a hardwired box. In this case, I attached a cord with a plug kit that I bought separately from the disposal unit. It’s as simple as feeding the wires from the cord through the disposal and attaching them to the matching colors on the unit with wire nuts.

If you have to hardwire the unit, wait until it’s installed under the sink. Note: It’s probably a good idea to shut off power at the breaker now, so as to avoid forgetting to shut it off later. If there’s anything worse than being shocked by a live wire, it’s being shocked by a live wire while under a sink.

If there’s an existing disposal, use the handy self-service wrenchette to disengage the old unit from the bottom of the sink. It will fit in the holes on bottom piece of the bracket. Twist the bottom piece clockwise while supporting the bottom to get it free.

How to Install a Garbage Disposal - Wiring

Photo: Kit Stansley

Step 2: Dishwasher Punch Out Option
This is not something you do with a misbehaving machine, but it’s a very crucial step if you have a dishwasher and you want it to work. If you don’t have a dishwasher you can skip directly to Step 3. For everyone else, there’s a little plug inside the dishwasher connection which needs to be punched out with a screwdriver and hammer. Again, only do this if you are attaching a line from a dishwasher at the time of installation.

How to Install a Garbage Disposal - Plumbers Putty

Photo: Kit Stansley

Step 3: Installing the Drain 
If there was an existing disposal attached to the sink already, it’s likely that the new unit will fit the existing bracket. If not—or if there is no disposal currently in place—start by removing the old drain. Most drains are attached to the sink by a large nut underneath the sink that can be turned counter-clockwise to loosen.

Installing the new drain is a simple matter: First, create a snake out of plumber’s putty and circle the drain from the top. Then install the top half of the drain from the top, and screw the nut and mounting bracket on from underneath. Make sure to remove any excess plumber’s putty using a putty knife.

Step 4: Installing New Unit
Position the unit so the existing pipes/hoses line up, and then use your self-service wrenchette to move the bottom piece of the mounting bracket counter-clockwise until tight.

Then attach the waste pipe (and dishwasher hose, if applicable).  If your unit is outlet-ready—pay attention to this part—make sure your disposal switch is in the “off” position before you plug the new unit in. While it’s unlikely that having a disposal start up while your head is pressed against it will lead to decapitation, it may scare a couple of years off your life. Not that I would know from experience.

If you need to hardwire the unit, make sure the power is off to the box (I recommend shutting it off at the breaker) and then attach the wires to the corresponding color using wire nuts.

Once the unit is plugged or wired in, turn the breaker back on, run the water and have fun chopping food waste to bits!

Source: https://www.bobvila.com/articles/how-to-install-a-sink-disposal/

Ace offers carpet cleaning, upholstery cleaning, pet odor removal, tile / grout cleaning and more to Anderson SC and all surrounding areas.

Carpeting is an important investment in your home. The early death of carpets isn’t the result of foot traffic; rather it is frequently associated with stuck soil in the carpet material. Rotating brush machines and daily vacuuming with strong suction removes only 50% of that soil.

To get the required carpet cleaning in Anderson SC you will need a professional carpet cleaning at least once every 6 months.

6 Home Care Tips When You Have Pets

Nearly two out of three households in the U.S., or 85 million families, own a pet. We love our furry friends, and that number shows no signs of slowing down. But cats and dogs often take a toll on our homes. They shed, they chew, and they have accidents on the floor.

Here are six ways you can keep your house in good condition, even as your pets continue to rule the roost.

Take Care of Pet Hair

Ever look down at your clothing, and it’s covered in hair that isn’t yours? One of the biggest problems with pets is their fur. It’s everywhere — your carpet, your furniture, your rugs. You can manage the amount of fur in your home in a few ways.

  • Put an old sheet or blanket down where your pet sleeps. Shake it out and wash it once a week.
  • Get your pets groomed regularly. Brush them between groomings.
  • Vacuum frequently. On carpets, use a rubber rake to get out all the hair.
  • Call a professional. You should have your carpet cleaned at least once a year. If you have more than one pet or high traffic areas, do it twice a year. Have them clean your upholstery, as well.
  • Use a lint roller or brush on clothing and furniture. Duct tape works great, too!

Freshen the Air

We live with them, so we may not notice but our pets have an odor. If you want to make sure visitors aren’t subjected to the smell, keep your home fresh. We’re fortunate to have great weather most of the year. It’s one reason South Carolina ranks so high on the quality of life index. So open the windows for at least 10 minutes a day before you start vigorously attacking odors.

  • Sprinkle baking soda on carpet, rugs, and furniture, then vacuum it up.
  • Have air fresheners, candles, wax melts, and a diffuser on hand. Consider some odor-neutralizing plants. We recommend spider plants since they can be planted in hanging baskets, out of the pet’s reach. A word of warning: Some odor-killing plants, such as philodendron, are toxic to pets.
  • Spray enzyme products on soiled or smelly areas. It kills the bacteria causing the odor.
  • Wash pet toys and bedding with vinegar.

Keep Their Paws Clean

Pets track in everything. Dirt, mud, grass, sometimes even animal waste. It ends up on your carpet and furniture. But you can control the mess in several ways.

  • Put them in pet shoes or booties. Just take them off when they come inside.
  • Put a towel and a shallow container of water by the door before you take them for a walk. Dip their paws in the water and dry them off when you get back. If your dog doesn’t like having his feet wiped, keep at it. He will eventually get used to it.
  • *Keep your yard free of pet waste to avoid tracking it in.

Keep Up With the Litter Box

You don’t want visitors to your home to know you have a cat the minute they step inside. But if you don’t keep the litter box clean, they will! Make it easier on yourself.

  • Use a litter box liner. You can pick it up all at once, instead of having to dump the box. A plastic garbage bag also works as a liner.
  • Use a covered litter box or make your own by cutting a hole in a large plastic storage box. It will do a better job of keeping litter off the floor.
  • Scoop it out every day and change the litter once or twice a week.
  • Keep the box in a well-ventilated area.
  • Put baking soda in with the litter.
  • Wash the litter box regularly.

Keep Their Food Area Clean

Most of us leave the dog dish out all the time. But if you don’t take care of the area, it can be an eyesore. Putting it out of sight and getting it out again twice a day is a pain but there are things you can do to keep the floor around the dish free of pet food.

  • Place something under the bowl. This can be a placemat or a towel, anything that’s easy to pick up and wipe off or wash.
  • Use a cookie sheet for easy pick-up. If you decide you would rather pick up the entire thing each time, set it on a small cookie sheet. They are inexpensive and easy to find.
  • Wash the bowls and wipe the floor and floorboards regularly.
  • Feed at set times instead of leaving food out all day for pets to graze. Of course, water should always be available but it’s much easier to wipe up.

Clean Stains Quickly

When you have pets, accidents are going to happen. Reacting as quickly as possible can help prevent permanent stains or odors. Dog or cat urine in a carpet can alter the color.

  • Blot stains with a cloth or a stack of paper towels, picking up as much moisture as possible.
  • Use an enzyme-based spray to keep stains and smells to a minimum. Or use a mix of clear dishwashing soap and water.
  • Call a carpet cleaning expert immediately, if you aren’t able to get the stain out.

These tips won’t prevent the need to have your carpet professionally cleaned, but they will make your house more liveable and your pets more loveable.

Annaliese Olson is a gardening and animal care writer. When she moved to the city from her family’s farm she decided she needed more nature in her life. She is dedicated to urban farming, she loves to creatively discover spaces for her animals and plants to blossom in her city home.

What to know about getting a roof inspection

Buying a home can be an exciting time in a person’s life but there is also some anxiety that goes along with it. For starters, many people wonder about what condition the home is currently in, and making sure that problems don’t arise once it’s purchased. In order for a person to feel comfortable before purchasing a home they must look into having the home properly inspected by professionals.

Home inspectors are available to perform an overall home inspection and to ensure that no major problems exist in the structure and function of the house. However, it’s interesting to note that general home inspectors do not typically inspect the roof. In order for this to be completed, one must hire a roof inspection company. Roof inspection professionals will climb onto the roof and give an overall record of the condition.

What Will a Roof Inspection in Greenville SC Accomplish?
Roofing inspectors are going to do more than climb up on top of the house to look at the tiles. They’ll provide a detailed report on the condition of the roof, including the roofing material, the flashing around the vents, chimneys, ridges, drip edges and caps. They’ll also provide the homeowner are also going to get a report on the roof drainage, including the gutters and downspouts.

Roof InspectionIf it is determined that repairs are necessary, they will need to be completed before a roof certification is issued. If repairs aren’t necessary, the roofing inspector will provide an estimate of how much longer the roof will last and a certification will be issued. Roofing certifications are typically good for up to five years, but it may differ from one area of the roof to another.

A number of different factors will be taken into consideration during the inspection. These include the pitch of the roof, the type of roof (single, tile, wood shake, etc.), the number of roofing layers and any previous repairs that may have occurred with the roof. These will all be included in the roof inspection report.

Sell Your Home with a Roof Inspection
Although much emphasis is placed on the need for a roof inspection from a buyer’s perspective, it is also a good idea for a homeowner to consider having a roof inspection completed before selling their home. If a homeowner can provide a current inspection and certification to potential buyers, it will help to put their mind at ease and make them feel comfortable before purchasing a home. If a homeowner doesn’t provide potential buyers with a roof inspection, they’ll simply order one on their own and make it a contingency of contract.

Having a good roof over your head is important for many reasons. Regardless of whether a person is selling a home or buying a home, they would want to ensure that the roof was in good condition. By having a roof inspection completed, they can have peace of mind in knowing that they will not likely have any costly repairs that are associated with their home purchase for years to come.

Article Source: http://EzineArticles.com/8015511

What to know to keep your roof in shape

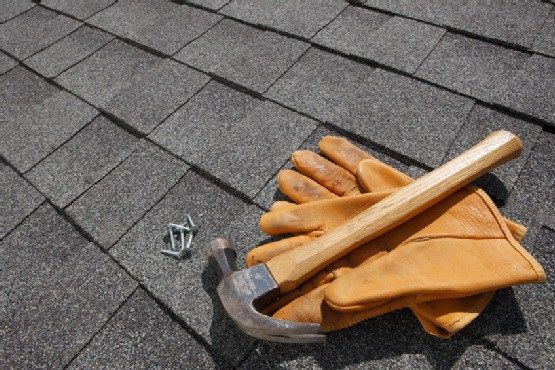
Everyone knows how important it is to have a good roof overhead. Your roof protects the rest of your home from damage, helps hold in heat or keep your home cool, adds value to your home and gives you and your family a healthier, happier place to live. Even if your roof isn’t new, if you follow these simple maintenance tips now, you may be able to keep your roof in tip top condition much longer than even the average 30 years covered by most warranties.

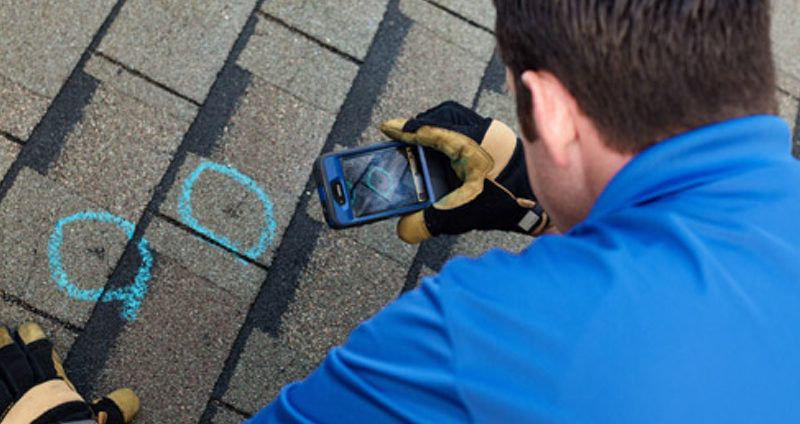
Roof inspections in Greenville SC should be done Twice A Year And After Every Heavy Storm

The first step in maintaining your roof in top condition is spending a little time inspecting your roof twice a year, in the spring and fall, and after major storms. The bi-yearly inspections should be done both on the inside and outside of the roof. After storm inspections should be done on the outside of the roof, to ensure that there is no broken tiles, or gouges from flying debris. Inspections should be done with using binoculars or a ladder.

Trim Overhanging Tree Branches

During your roof inspections make note of any trees growing close to the house and roof. If there are branches hanging over the roof these should be trimmed back if healthy. Falling leaves or pine needles can end up in valleys of your roof where they can hold in moisture and rot the tiles making them weak and allowing rain water to soak through doing further damage to the structure of your roof. In addition, falling branches can gouge the roof and damage roofing tiles. By trimming those branches before they can do damage you are protecting your roof by using preventive measures.

Clean All Debris From Your Roof

Roofing MaintainenceYou also need to clean all the debris from your roof at least twice a year. Dirt, leaves, pine needles and other debris can overtime cause mold and mildew to grow on your roof and cause other damage as well. By keeping your roof free of debris you are removing the potential for damage to your roof and helping to not only to look better, but remain in the best condition possible.

Don’t Allow Mold and Mildew to Grow

Black spots on your roof is a sign of mold and mildew. Overtime mold can work it’s way into your roofing tile and cause damage to the underlying roof itself. If you have a new roof that is free from mold and mildew, placing zinc strips at the peak of your roof will result in zinc washing off the strips each time it rains and preventing mold and mildew from growing. If you have an older roof that has begun to mold, then clean the mold from the roof using a mold remover specially made for roofs and then attaching zinc strips.

Keep Those Gutters Clean and In Good Repair

Clogged gutters can cause thousands of dollars of damage to your roof as water can back up under many different types of roofing materials. By keeping your gutters free of debris and in good repair you ensure that they can perform the job they are meant to do, which is keep the rain water away from your roof and those roofing tiles.

Replace Damaged Shingles and Roofing Tiles

Many people make the mistake of thinking that one missing shingle, or damaged roofing tile really isn’t going to hurt anything. This couldn’t be more false. If you want to keep your roof in tip top shape then you need to replace those shingles and tiles that become damaged. Even a small corner torn off a tile can allow your roof to suffer a lot of damage. So keep extra shingles and tiles on hand and learn the correct way to repair them should the need arise.

Replace Roof Sealants as Needed

Check all the places where roof sealant is used and if the sealant is showing signs of wear and tear such as cracks or small missing pieces then you need to clear all the old sealant away and reapply fresh sealant.

Replace Cracked Mortar Around Chimneys

Make sure that you check your chimney for cracked or missing mortar and replace that mortar that is damaged. The mortar is what holds the chimney bricks in place and should a brick fall it can do great damage to your roof as well as result in your losing your heating an inopportune time.

Don’t Forget Snow Removal

If you live in an area that gets heavy snowfall and you have good insulation then snow is bound to pile up on roof. Snow can be extremely heavy and cause damage to your roof from the excess weight. In addition, thawing and freezing of snow on the roof can cause ice to back up until roofing tiles, damaging the tiles and roof itself when the spring thaw arrives.

Have A Professional Inspection of Your Roof

While you can do most of your roof inspection and maintenance yourself you should have a professional inspection at least once a year or every other year if your roof is older than ten years old. Professional roofing in Greenville SC companies can spot potential problems and fix them long before they will be noticeable to you. It costs less to have a professional inspect your roof and make repairs than it will to have to replace your roof sooner than necessary.

By following these easy maintenance tips, you can keep your roof in tip top condition for years to come and just may find that your roof outlasts the warranty by two, three, or even 5 years.

Article Source: http://EzineArticles.com/7503398

  • 1
  • 2